Part 6: Creating the template in Dreamweaver
Templates are important because 1) they allow you to create new pages quickly and 2) they allow you to edit elements that appear on multiple pages just once. For instance, if you have a 25-page website and you need to add a navigation link, with a template you can edit the navigation once and all the pages are edited, rather than open up all 25 pages to make the edit. It also ensures that the corrections are consistent and correct.
Moving your style sheet
The last thing you'll do in this case is to take your styles from this document and move them to a separate style sheet, styles.css.
- Create a new file: File>New, click New Document and select css, click "Create", and when the page comes up, save it as "styles.css" in the folder with the rest of the project.
- Select your styles from the template.html file (DON'T include the <style> elements; they will break the style sheet)
- Cut it (command-x on the Mac — this deletes it and places it in memory)
- Go to the style sheet and paste it and save it
- Go to Tools>CSS>Attach Style Sheet, browse to the style sheet you just created (make sure it's the correct one!), make sure that Link is checked (rather than Import), and click "OK"
- When you deleted your styles your page's styling should disappear; when you link the style sheet they should reappear.
- Note: When you linked to the style sheet, a link
<link href="styles.css" rel="stylesheet" type="text/css">was placed in your head; I recommend going back, cutting it and pasting it above <style> so any styles you write for this page don't get overridden by the style sheet.
Create a text file, name it "styles.html" and save it in your project folder. Go to template.html and select everything between <style> and </style> and cut it. Save the template.html. Go to styles.css and paste that css code and save the styles.css file. Go to the template.html file and, just above <style>, create a link:
<link href="styles.css" rel="stylesheet" type="text/css">
Preview your template.html in a browser and your styles should be active.
Creating a template in Dreamweaver
The section is not possible in handcoding unless you work in php.
Look at your "template.html" file in Dreamweaver. Click on the code portion of the screen, then go to File>Save As Template. It will ask you to Update Links? — click "Yes". (If you look at your links, they all now include some additional code in front of them. This is because the template.dwt is being saved in the Template folder for your WWW site, which is not inside your project folder; it has to relink from where the template is.)
Save the template.dwt file where Dreamweaver wants to save it. (Your styles and images may go away; go to View>Refresh Live View and they should show up; otherwise you probably have a problem with where it's saved to.)
Long note about the template folder
We're working with a special instance of the Dreamweaver template folder. Usually, you'll create a site with only one project in it, and when you create the template.dwt the template for that project will be placed in a folder in that project. The template for the project is in that project's folder.
Here the site is www, a folder that then contains multiple projects — project1, moodboard, etc. We did this to make it easier to check that the projects were linked correctly to the home page and to upload them.
Dreamweaver prefers to put the template folder in the first level of the site folder.
In this case, since the site contains multiple projects, all templates for all projects will be in a single template folder outside all of the projects. So:
- When creating the template, when Dreamweaver updates the links, the links will be correct for this template folder outside the project folder. So the links, instead of being simple (
.../images/image.jpg) will be more complex (like...harmonic_project/images/image.jpg). - When you create a new page from a template, you will have to MAKE SURE that you are saving the files back into the correct project folder and not into the general www folder.
- Your templates are "co-mingled". You will have to place the correct templates in their correct project folders to upload to another server. (In Dreamweaver, create a template folder in the project folder you want to move, then place its template into the project folder using the Files pallet. Dreamweaver will ask you to update the links, and tell it "yes". Hopefully you won't have used that template for any other project.)
Adding "Editable Areas" to your template
If you scroll to the top of the page, you will see <!-- TemplateBeginEditable name="doctitle" --> before the <title> and <!-- TemplateEndEditable --> after it.
What this will tell Dreamweaver when we use a template is that this area is an "editable area" — text outside this area will only be editable using the template. We'll need to create an editable area for the content int the <main> and the content in the <aside>.
Scroll down to the end of the <head> and cut the <style></style> and place them inside the "head" editable area, like this:
			 <!-- TemplateBeginEditable name="head" -->

			 <style>

			 </style>

			 <!-- TemplateEndEditable -->
Don't try to add the editable area inside the <style> element. First, Dreamweaver won't let you. Second, if you open up Textwrangler and force the editable region code to be inside the style element — just to be tidier — you will find that they won't work, because the regions are coded in html and, inside the <style> elements, the only code that's recognized is css.
Scroll down to the <main>. Select everything from just below the <main> to just before the </main>. Go to Insert>Template>Editable Region. When the window opens, rename "Edit Main".
Scroll down to the <aside>. Select everything from just below the <aside> to just before the </aside>. Go to Insert>Template>Editable Region. When the window opens, rename "Edit Aside".
Elements dissappearing. Make SURE, in placing the editable area, that the <main>, <aside>, or other elements don't disappear. Sometimes they do.
Scroll down to just above the </body> and insert your cursor. Go to Insert>Template>Editable Region. When the window opens, rename "Scripts". When it places the Editable Region, delete the white word "Scripts".
Save the template.dwt. A folder called "Templates" will be created, and template.dwt will be saved in there.
About using Dreamweaver templates:
- Template.dwt is different from the template.html. If you make changes to template.html instead of template.dwt, those changes won't show up on your pages. (I suggest creating a folder called "original template" and hide template.html in there.)
- If you want to make changes to anything on your pages that is NOT in an editable area, you will need to make them to template.dwt
- If you make changes to template.dwt, Dreamweaver automatically asks you if you want to update the pages on your site that use it.
- You can edit the template.dwt or any of the pages you create from the template in any standard text editor. DANGER! if you edit them from a text editor, you will have to manually update them (Tools>Templates>Update Pages) when you return to Dreamweaver. Not impossible, but it's safer to stay in Dreamweaver if you are going to use the template feature in Dreamweaver.
Creating a page using the template.dwt
To create a page using template.dwt,
- Make sure template.dwt is saved.
- Go to File>New
- In the left column, select "Stie Templates"
- In the middle column, select your site (some variation on WWW?
- In the third column, select "template" or whatever you called your template
- A preview of your template should appear in the fourth column. Make sure "Update page when template changes" is checked.
- Click "Create" and a new page using the template is created.
- Save the file into your project folder with the name "index.html"
- Repeat for classes.html, faculty.html, video.html, news.html and contact.html
Working with the pages you created: faculty.html
First, go to each page and, in the <title> element, change the name to reflect the page it is, such as: "Harmonic Studios, Anytown, IN | The Best School for Strings!" for index.html, and "Harmonic Studios, Anytown, IN | Classes" for classes.html.
We used the content for the home page on index.html, so leave index.html alone. (Actually, if you want to make changes to the body text on index.html, you'll need to make them to index.html; any changes to text within the editable areas on template.dwt won't be made to index.html.)
Open faculty.html.
Download faculty_table.txt
Select all the contents of <main> and delete them.
Go to File>Import>Tabular Data. Browse to the faculty_table.txt data, which is a list of data separated by tabs with each line ending in a return. Delimiter = "tab", table width = "Fit to data", "cell padding" is empty, "cell spacing" is empty, delete the one from "border" and click OK.
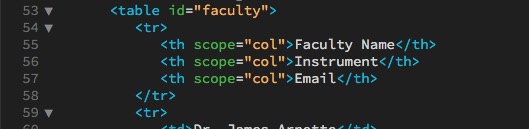
Add id="faculty" to the <table> element.
You'll notice that the top row (<tr>) of the table is headers for the information. We're going to make that semantic and add an WAI-ARIA designation by changing the opening element for those cells from <td> to <th scope="col">.
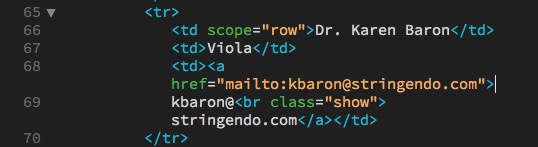
Then make all the email links live. Select an email link. Go to Insert>HTML>Email Link. Enter the email address, or if it recommends your selected text as a valid email it may enter the link value itself.
Finally, go above the <table> and add "Stringendo Studio Faculty" and surround it with an <h2> element.
Styling the table
Make the table 100% wide, so it's mobile-compatible. Add margin on the bottom so there's more space before the footer. (A longer-term solution might be to add padding to the bottom of the <main>.) We add border-collapse so the cells of the table don't have 1px of space between them, which they will otherwise (remove the border-collapse once the table is fully styled to see what we mean.)
table {width:100%; margin-bottom:20px; border-collapse: collapse;}
Add some padding to the cells.
td, th {padding:6px;}
Color every other cell "tan" (a variation of the pseudo-class technique we used earlier).
tr:nth-child(2n) {background-color:tan;}
Make the headers Open Sans Bold and a little smaller than the faculty list.
th {text-align:left; font-family:'open sans', arial, helvetica, sans-serif; font-size:14px;}

Hiding and showing elements
If you narrow the page, you'll notice that the table narrows nicely up to a point, when it stops.
One place where it hangs up is the header "Instrument". Go into the code and change "Instrument" to Inst<span class="hide">rument</span>. Then add a new @media:
@media screen and (max-width:786px) {

				#faculty .hide {display:none;}

				}
This tells the page that, below a certain width, it's to hide a piece of the code.
We also want the email to break; we can do this by having a break (&th;br>) show up at @media size to break the email to two lines. Add <br class="show"> after the ampersand in the email address (not in the href but between the <a> tags).
Then add the @media:
@media screen and (max-width:625px)

				#faculty .show {display:inline;}

				}
When you make the window smaller, "uments" gets hidden and the email breaks onto two lines, making the table much narrower.
Faculty Aside
Download faculty_table.txt
Delete contents of <aside>.
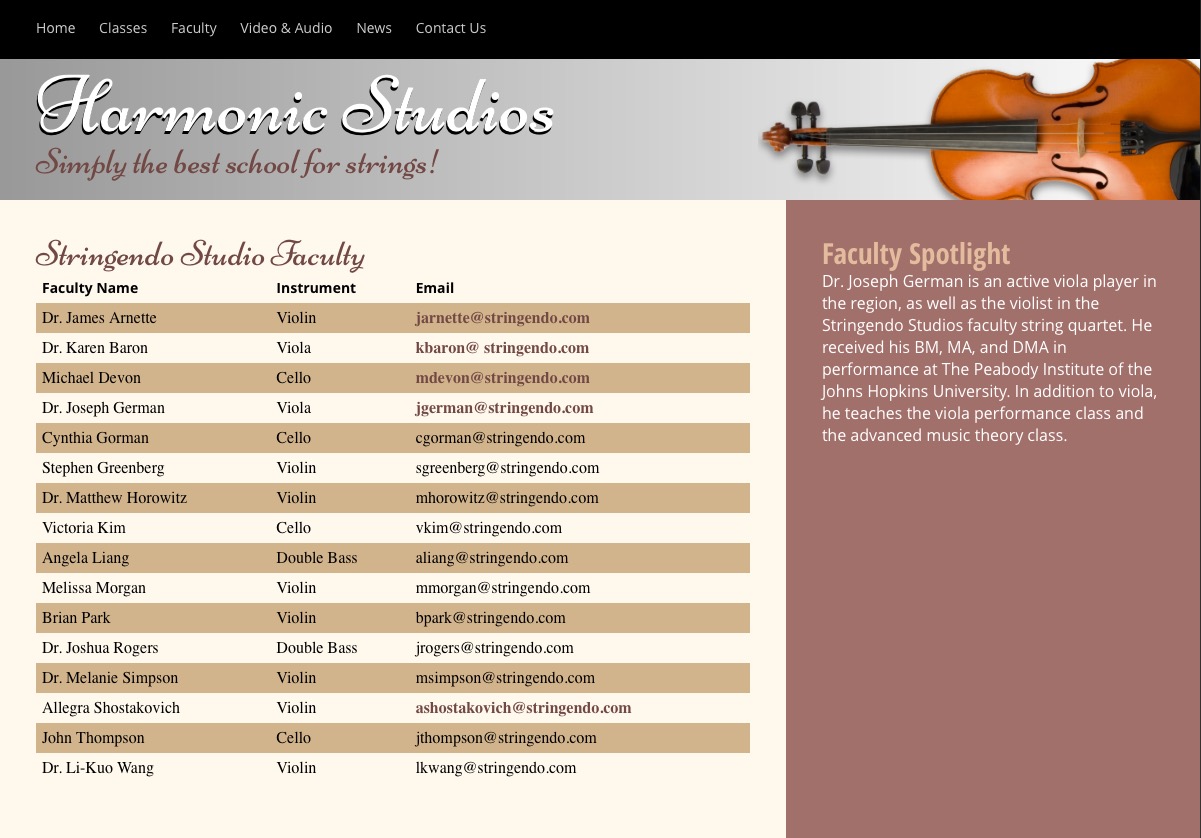
Open file faculty_spotlight.txt, copy the contents and paste into the <aside>. Format the subhead as an <h2> element and the body copy as a <p> element.
Completed, it looks like this:
Classes page
Download faculty_table.txt
Open classes.html
Delete the contents of <main>. and paste in the <h2> and <table>.
Go to the style sheet and add this:
table    { display: table }
tr       { display: table-row }
thead    { display: table-header-group }
tbody    { display: table-row-group }
tfoot    { display: table-footer-group }
col      { display: table-column }
colgroup { display: table-column-group }
td, th   { display: table-cell }
caption  { display: table-caption }
What we are doing here converts the table from a standard table to a css table. It should not look any differently, but it gives us options — particularly if we add classes to specific cells — such as telling cells at certain @mobile widths to hide, tell cells to be 100% wide, and other tricks.
Final Validation
If you are using Dreamweaver, look through the code for line numbers that are in red, indicating there is a problem. Click the red numbers and they should give you an idea what the problem is.
If Dreamweaver that you have unclosed elements and aren't sure what they are, you can insert your cursor before the </body> element at the bottom of your page, type </ and hit return, and it will auto complete whatever hasn't been closed. Look for those unclosed elements, close them, and try again until you get </body> right before </body>, and then you'll know all the unclosed elements. (Working on these instructions I had as many as six unclosed <p> elements I had to go back and find.)
Once you've fixed all the line number errors, go to File>Validate>Current Document (W3C) and your document will be validated.
W3C HTML Validator
If you don't have Dreamweaver, copy the code from your page, go to the HTML Validator at https://validator.w3.org/, paste your code in, and it will tell you on which lines your html has errors. Fix the code and repeat the process until you don't have any errors.
If you are having problems with your css, they also have a CSS Validator at https://jigsaw.w3.org/css-validator/.